


Hard Woods
Sanding hardwoods is a crucial step in achieving a smooth, even finish on any woodworking project. Hardwoods, such as oak, maple, and cherry, can be challenging to sand because of their density and tight grain patterns. However, with the right tools and techniques, sanding hardwoods can be a rewarding process that results in a beautiful, high-quality finish.
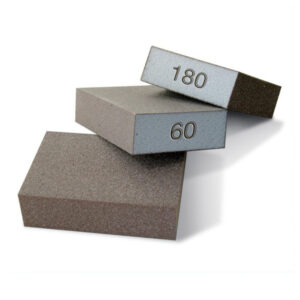
The first step in sanding hardwoods is to select the right sandpaper grit. This will depend on the current state of the wood and the desired finish. If the wood is rough and uneven, start with a coarse grit sandpaper, such as 60 or 80 grit. If the wood is relatively smooth, start with a medium grit, such as 120 or 150 grit. For final finishing, a fine grit sandpaper, such as 220 or 320 grit, is recommended.
Before beginning the sanding process, it is important to clean the wood surface of any debris, such as sawdust or dirt. This can be done with a vacuum or a clean, dry cloth. It is also important to wear protective gear, such as a dust mask and safety glasses, to prevent inhalation of dust particles.
When sanding hardwoods, it is important to work with the grain of the wood. Sanding against the grain can result in scratches and imperfections in the wood surface. Begin sanding with the coarsest grit sandpaper and work in the direction of the grain. Use light pressure and work in a back-and-forth motion. It is important to keep the sandpaper flat and even to avoid uneven sanding.
After sanding with the coarse grit sandpaper, move on to the medium grit sandpaper. Sand in the same direction as the grain, using a back-and-forth motion. Again, use light pressure and keep the sandpaper flat and even. Sand until the surface is smooth and even.
For the final sanding pass, use the fine grit sandpaper. Sand in the direction of the grain, using light pressure and a back-and-forth motion. This will remove any remaining scratches or imperfections from the surface of the wood. After sanding with the fine grit sandpaper, wipe the surface of the wood with a clean, dry cloth to remove any dust or debris.
When sanding hardwoods, it is important to use high-quality sandpaper. Cheaper sandpapers may not be as durable or effective, resulting in uneven sanding and poor finishes. It is also important to change sandpaper frequently to avoid clogging. Clogged sandpaper can result in poor sanding results and can damage the wood surface.
Another important tool for sanding hardwoods is a sanding block. A sanding block is a flat, rigid block that can be used to hold sandpaper flat and even. This helps to avoid uneven sanding and can result in a smoother, more even finish. Sanding blocks can be purchased or made from scrap wood.
In addition to using high-quality sandpaper and a sanding block, it is important to take breaks and stretch your hands and arms during the sanding process. Sanding can be a physically demanding process and can result in repetitive strain injuries if proper precautions are not taken.
After sanding hardwoods, it is important to apply a finish to protect the wood and bring out its natural beauty. A variety of finishes can be used, including oil-based stains, varnishes, and polyurethane finishes. It is important to follow the manufacturer’s instructions when applying finishes and to allow sufficient drying time before using the finished piece.
In conclusion, sanding hardwoods is a necessary step in achieving a smooth, even finish on any woodworking project. With the right tools and techniques, sanding hardwoods can be a rewarding process that results in a beautiful and durable finish. It is important to use high-quality sandpaper, work with the grain of the wood, and take breaks to avoid repetitive strain injuries. By following these tips and techniques, anyone can achieve a professional-looking finish on their hardwood projects.