


Blog
August 18, 2025
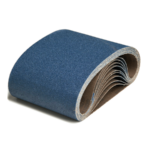
How to Measure a Sanding Belt (4 Fool-Proof Methods)

Record sizes as width × length (full loop circumference). Choose a method below.
Method 1Fold & Measure (fastest)
1
Lay the old belt flat and fold once to make a double layer.
2
Align the splice at one end and the fold at the other; measure splice → fold.
3
Double that value for the total loop length (circumference).
4
Measure width; record as
width × length.If the belt is split, cut it once and measure end-to-end — that equals the loop length.
Method 2String Method (no tape measure)
1
Route a piece of string along the exact belt path (tension released).
2
Mark where the string meets; cut or hold the mark.
3
Lay it flat and measure — that’s your loop length.
4
Measure and note the width.
Helpful notes
- Tolerance: If you’re within a few mm of a standard length, round to the nearest common size.
- Common lengths (mm): 915, 1000, 1220, 1320, 2000 (others available).
- Metric ⇆ Imperial: 1″ = 25.4 mm. Example: 2″ ≈ 50.8 mm.
- Record format: always
width × length, e.g.50 mm × 2000 mm. - Width tip: If you don’t have the old belt, read the contact wheel width or the machine’s spec plate.
Ordering checklist: width × length, grit, quantity, and application (e.g. stainless steel, hardwood). If unsure, tell us your material and finish goal—we’ll advise the best belt type.
Popular sizes (quick reference)
| Width | Common Lengths | Notes |
|---|---|---|
| 10–13 mm | 330, 457, 610 | Finger files / narrow arm sanders |
| 25–50 mm | 915, 1000, 1220, 1320 | Bench sanders / Dynafile types |
| 75–100 mm | 2000+ | Larger linishers & belt grinders |
FAQ
My belt snapped — can I still measure it?
Yes. Cut it once to create a straight strip and measure end-to-end for the loop length; measure width as normal.
What if the machine has auto-tension?
Release tension before measuring (string or tape). Auto-tension can add length if left engaged.
Related posts

PPE for Sanding Wood & Metal: What Inspectors..
PPE for sanding wood and metal is a frequent inspection topic in 2025. Inspectors want to see..
Read more

Wood Dust Compliance Checklist (2025)
Wood dust is a respiratory sensitiser and hardwood dust is classified as carcinogenic. This..
Read more
Trizact Belts Explained: Consistent Finishes on..
When it comes to achieving a consistent, repeatable finish on stainless steel and other hard..
Read more
Wet vs Dry Sanding Belts: Pros, Cons & Best..
When it comes to sanding, the choice between wet sanding belts and dry sanding belts can make..
Read more
Why Do Sanding Belts Break? Common Causes &..
Sanding belts are designed for durability, but even high-quality belts can break if something..
Read more

Aluminium Oxide vs Zirconia vs Ceramic
Choosing the right abrasive grain is just as important as choosing the correct grit size or..
Read more